Design Elements
When considering what type of materials or features to add to your landscaping design, here’s some landscape design elements to consider when planning your landscape layout.
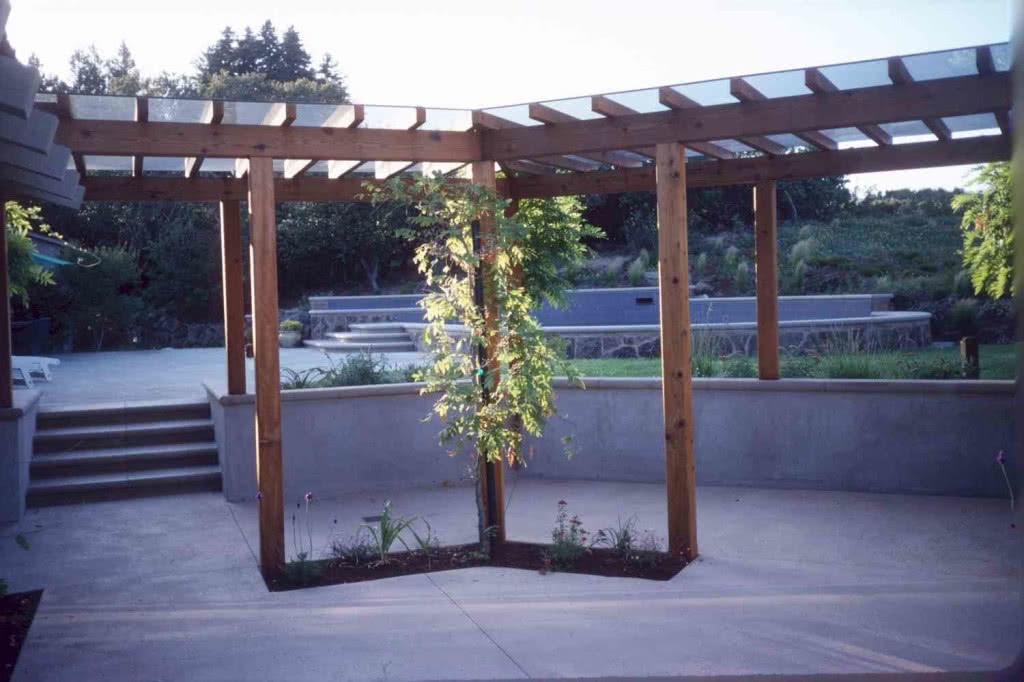
Typically constructed of wood, an arbor is any overhead structure. Common examples include wooden arbors over a patio or decking to provide shade, support down-lighting for night time dining and entertainment, provide a mounting location for outdoor speakers, or support climbing plants such as grape vines, wisteria, jasmine, or roses. The amount of shade provided or the weight bearing capacity of an arbor depends on the size of the wooden members and the number of layers in your arbor: the bigger the beams, the more weight capacity and further distance between posts; the more layers (6×12 beams, 4×6 rafters, 3×4 upper lattice, for a three-layer arbor); the more shade. Be aware that overhead wood may stain your lower patio surface (redwood will bleed tannins and stain underlying concrete surfaces typically), while painted or treated wood requires frequent refinishing to maintain its clean appearance. Consider western red cedar rather than redwood for a natural, low-staining arbor material, a metal arbor, or covering an arbor with tempered glass to further protect the structure (and yourself) from the elements.
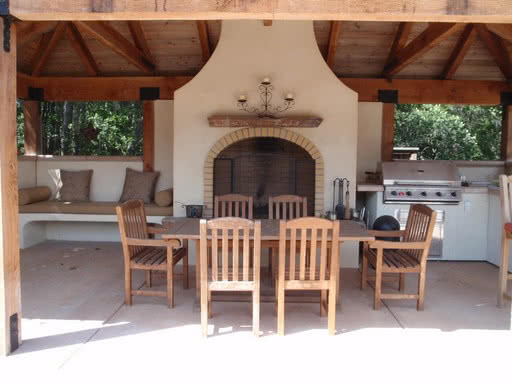
Outdoor dining brings an entirely new purpose to any outdoor living space, and a good BBQ can certainly be a pleasure to cook on. From the humble charcoal briquette Hibachi to The Green Egg to the most elaborate radiant flow stainless steel gas powered built-in self-igniting temperature controlled Grill-to-End-All-Grills, it’s hard to beat veggies and meat over an open flame. Personally I prefer not to stink up my house with fish odors or set off my smoke detectors as my meat cooks ( uh, burns? ), choosing to cook on my outdoor grill instead of cooking inside my kitchen every chance I get. For the wood purists, a true free-standing indirect-heat BBQ is best. For convenience, it’s hard to beat a stainless steel grill plumbed directly to your house’s gas supply (never runs out of propane in the middle of that important dinner party….), accompanied by a built in sink with hot / cold water, garbage disposal, refrigerator, ice maker, blender outlets, and plenty of counter space to set your favorite beverage on!
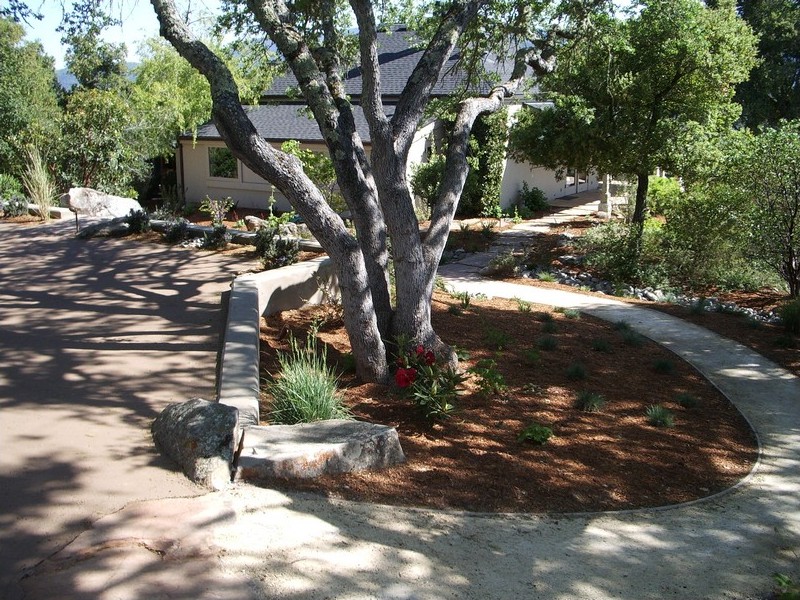
Think edging. Bender board is a commonly used rather generic term to refer to any type of edging material used to define or contain a space. In earlier days, bender board was a literal wooden board, typically a 2×4, placed in the ground along a patio, lawn, gravel walkway, or other area, and did not in fact bend. The “bender” aspect came into play when contractors started screwing multiple layers of thin, flexible wooden 1×4 boards together to provide a curved edge with the finished laminated thickness of a 2×4. Now, bender board comes in numerous configurations, from various plastic “board” thicknesses and profiles to aluminum, steel, or even copper edging. The choice of materials comes down to price, longevity, and visual aesthetics, and it is truly a personal choice. Woods such as redwood will last a few years in the ground at most before rotting away. Plastics will last forever, but depending on the profile, may warp and bend over time (hard to keep that straight line OCD laser perfect straight, but looks great on curves). The various metal materials all have price vs. aesthetic trade-offs, with simple aluminum edging being a very popular choice for most applications. The photo below is plastic 1×4 edging used to contain a compacted decomposed granite walkway, and was installed in 2001 (photo taken in 2012).
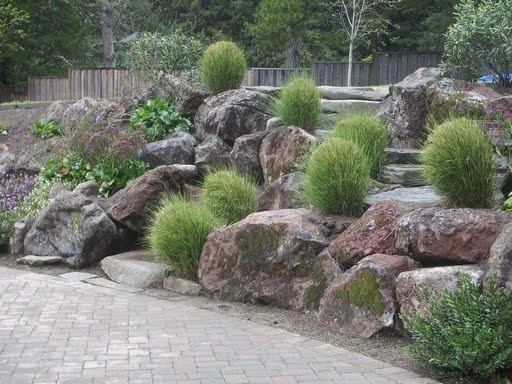
Aaaahhhhh, the humble Rock. From whacking dinosaurs to building coliseums to decorating our modern yards, stone has always been a part of our natural surroundings. Landscape boulders usually fall into two categories: Accent Boulders and Rock Walls. Accent boulders are typically of a larger size, say 400lbs-800lbs minimum (about the size of a wheelbarrow), and are strategically placed throughout the yard to draw attention to certain areas (the end of a walkway, the bend in a creek, the base of a tree). When choosing accent boulders, remember you’re trying to make a statement, so size does matter. Also, rough moss covered stone conveys age-in-place (the stone has been there forever), whereas smooth rounded stones convey water movement (rocks rounded and polished by a river or ocean). Conversely, rock walls are built from boulders of various sizes, carefully placed together jigsaw-fashion to provide structural support to a hillside or placed free-standing to define a space (the size of the boulders used depends on the height of the wall, bigger the wall, bigger the boulders needed). When choosing rock wall material, again, size most definitely matters. Too many times a home owner will build a rock wall using round, loosely stacked, basketball-sized boulders because they are easier to lift and place (about 40lbs-90lbs each), only to have the wall fall down because the stones were too small to support the weight of the soil behind it. Multiple sizes, multiple shapes, and large foundation stones are key to a successful dry-stacked boulder wall
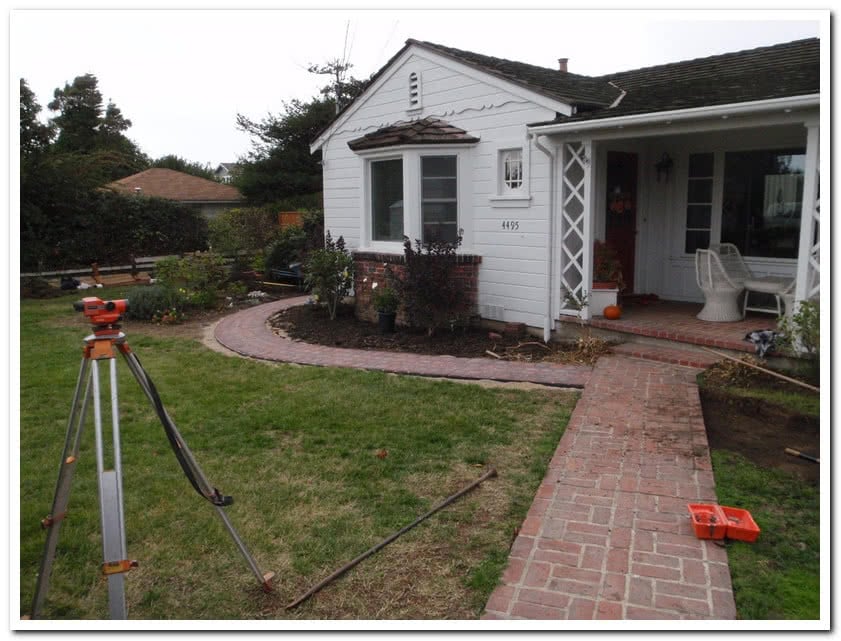
Before there were windows, there were bricks. While throwing a brick through a window is generally considered a bad idea, using bricks as a paving or building material is a great idea. When thinking of bricks, most people conjure up an image of the traditional red brick, a rectangular lump of red baked clay material approximately 2in x 4in x 8in in size (ya know, about the size of a brick). There are, however, an incredible number of different styles and colors of the common brick, including new (clean red, clean edges) to tumbled (dusty red, chipped edges) to fire (yellow in color), to white (good guess, white in color), to real used (all chipped up with grey mortar, taken from an actual demolition site), to manufactured used (made to look all beat up before they even leave the factory), and the list goes on. Brick styles are as varied as paint colors, and sometimes just as hard to choose for that perfect landscape accent. If you are considering brick, chances are your home already has a brick element, so try to match what you have.
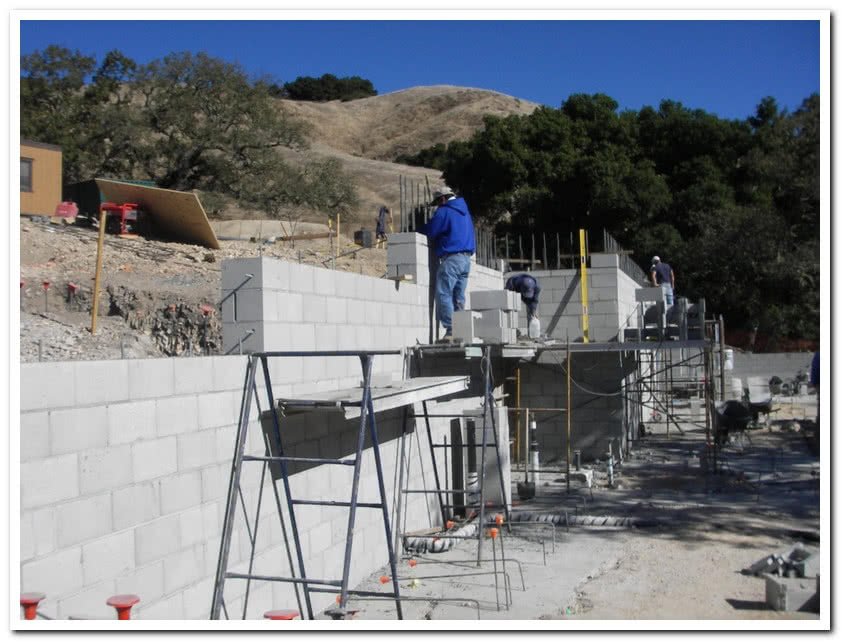
CMU stands for Concrete Masonry Unit, and describes quite a variety of different shapes, sizes, and configurations, but the general purpose of all CMU is the same: to act as a form for a concrete structure. The most common landscape CMU is a grey concrete H-shaped block, either open or closed on each end, 8in wide x 8in tall x 16in long (a typical 8x8x16 speed block). They are stacked end to end, row after row, by masons using mortar to hold the hollow blocks in place. Rebar, structural steel rods, are included both vertically and horizontally within the CMU structure, and tied into a substantial concrete footing which acts both as a weight bearing base and an anchor against horizontal forces (prevents tipping over). At this stage the CMU wall is actually hollow inside, nothing but empty space and rebar, and can easily be knocked over. The actual strength of the wall to resist the force of retaining a hillside, for example, comes from filling the hollow CMU interior with concrete. The same wall could be built using wood or styrofoam forms and achieve the same result once concrete is poured into the interior. CMU walls require waterproofing on both sides to prevent weeping through the joints, and often receive a final stucco exterior finish. It is also important to allow for proper drainage, both subsurface and surface (two separate systems), to relieve hydrostatic tension behind the wall and prevent surface water from flowing over the top.
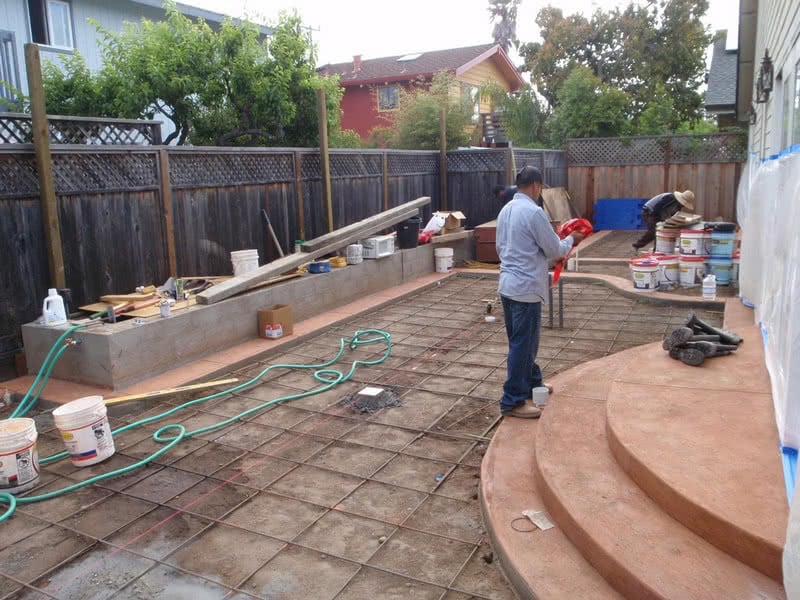
One guaranteed aspect of concrete: it WILL crack. No matter the thickness, the amount of reinforcing rebar, the sand-cement-rock ratio, special fly ash, glass-reinforcing, or epoxy additives, carefully placed and spaced expansion joints, etc etc, concrete always does and always will crack wherever it darn well pleases, guaranteed. Concrete surfaces are incredibly strong under compression, able to handle the landing impact of huge aircraft or support tall buildings, but give concrete a little expansive force, and suddenly all the strength shifts from the no-longer-compressed concrete to the now-expanding rebar reinforcement. While you may not be engineering a bridge in your back yard, I’m sure you would like your concrete patio, walkway, or driveway to last for years and years without cracking apart and having to be replaced. When pouring concrete, pay attention to the quality of your subsurface (compacted baserock or drainrock is best), the number, size, and spacing of your rebar (#4 rebar 16in O.C. is usually quite adequate for walkways), and the concrete mix itself (6sack is preferable). If none of those numbers or words mean anything to you, good. It means I still have a job. Properly done, concrete will develop hairline cracks fairly early (within the first year), but won’t actually shift or separate.
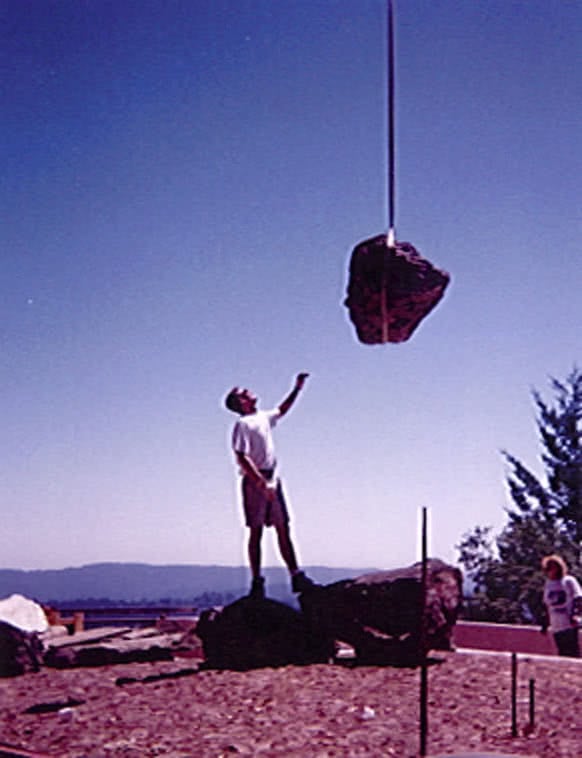
Sometimes we get to play with the Big Boy Toys! Crane days are always fun on a jobsite. Something about lifting 6000lb, 30ft tall, 84in box trees over a house to be planted in the backyard is just, well, fun! And maybe a little scary, so home owners, do NOT try this yourselves! Personally, I love using a crane to set boulders. Each rock, being of a different weight, shape, and roughness, is tricky to get just perfectly balanced in the lifting strap, yet secure enough to safely lift over head, over houses, over my truck, etc. Cranes are the perfect tool when needing to place large heavy objects into spaces where access is limited. Charged by the hour, crane services provide different sized machinery to match your lifting needs, weight and reach being the two primary factors used in determining the proper size crane required. From experience, our crane operators ask us what we intend to do on any particular crane day, calculate the typical sized crane required based on information we tell them, then always double or triple the crane size they bring out because we inevitably try to go just a little farther, or maybe just a tad bigger boulder waaaaay over there, to achieve that perfect landscape look we’re going after.
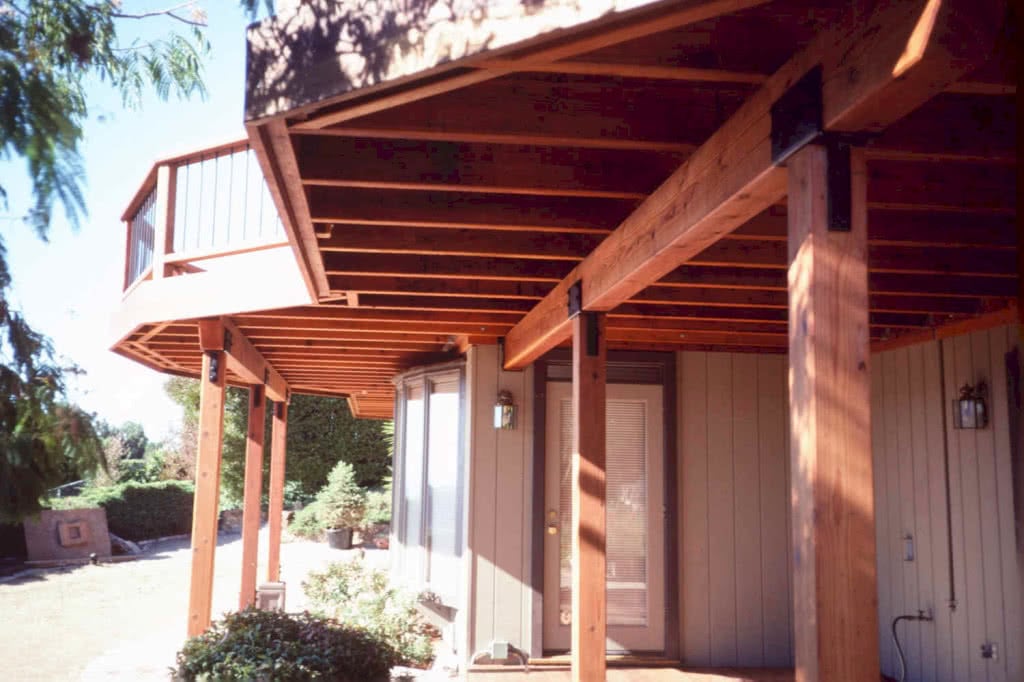
With the development of newer synthetic materials and the availability of sustainably harvested woods, decking is making a comeback in the landscape industry. In any location where being elevated off the ground is a must, decking is the go-to choice for ease of installation and cost effectiveness. Traditional wooden decks have been a part of our history since we first slept in a tree with a few branches spread beneath us. Locally harvested forest lumber usually makes the most cost effective choice for any landscape decking project, as the expense of transportation from a nearby forest to lumber yard to your yard is minimal. Depending on where you live, your locally grown lumber may or may not be the best choice for wooden decking longevity, however. Hardwoods, including tropical hardwoods, are heavy, dense, and very rot resistant, as well as rather expensive. Softwoods, conversely, tend to be lighter, stronger for their weight, and not as rot resistant, but relatively inexpensive. Now synthetic decking materials compete favorably in today’s market. As the cost of sustainable lumber has climbed, the cost of synthetic materials has decreased. In any wet environment, such as a boat dock or diving platform, synthetic decking will far outlast natural lumber. Whichever choice of upper finish material you decide upon, remember that the visual decking you walk on is just the topmost of three layers: heavy beams and sturdy posts first, followed by joists, finally topped with finish decking. Pressure-treated lumber is still the choice for decking underlayment, and as your entire structure depends on the strength of its foundation, don’t skimp on your underlayment.
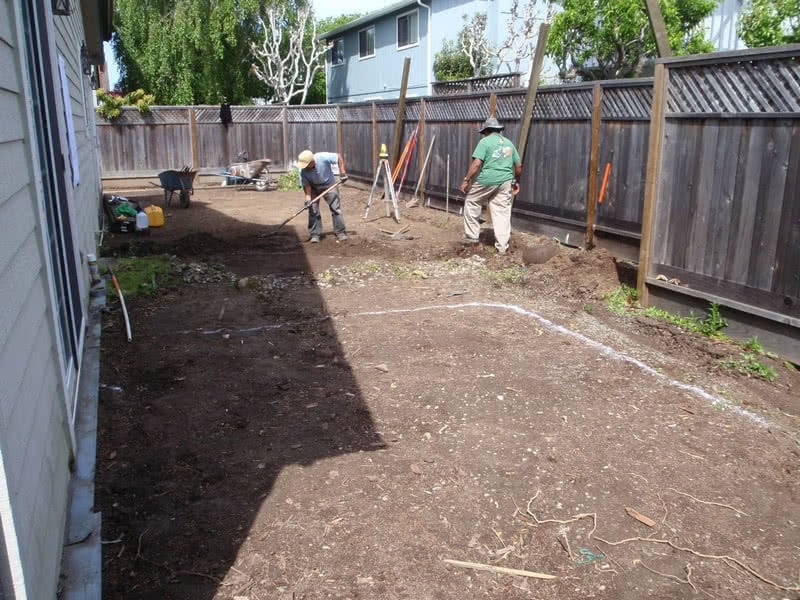
“Take out the papers and the trash…. Or you don’t get no spendin’ cash….. Get all that garbage out of sight…. Or you don’t go out Friday night….” So that snappy song by the Coasters goes, and it certainly holds true for any landscape project. When we put together landscape cost proposals for clients, the second line item (after move-on and porta-potty expenses) is traditionally Demo & Dump Existing Landscape Features. This is where we utilize our most used tools, the tractor, the dump truck, and a crew of workers with shovels, rakes, picks, and wheelbarrows. Our first presence on the job usually involves wiping the slate clean, bulldozing the property, removing all dead, broken, unwanted landscape features, and hauling it all away to recycling or the landfill. What is left is a clean, pristine slate, ready for orange marking paint (to outline areas), stakes and string (to establish reference points and critical elevations), and some good old fashion foot dragging in the dirt (to get creative with the shape of lawns, planters, patios, and the like). When taking on a new maintenance client, we will often begin with a day or two of Cleanup, to establish the property as maintainable, and to help define what stays, and what goes. Unless you already own all the necessary power tools, hand tools, tractors, dump trucks, and a steady supply of aspirin and band-aids, please leave your Demo & Dump needs to us: we need the spendin’ cash!
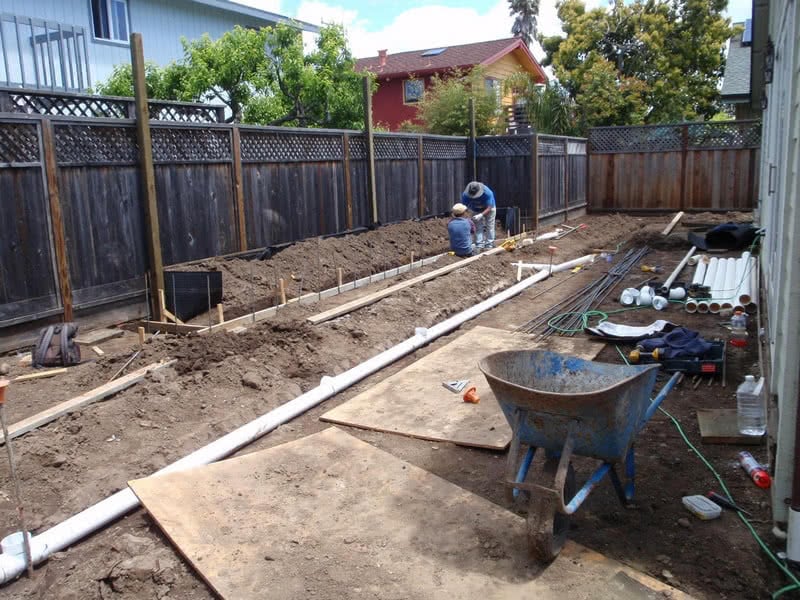
Unless you want your newly invested landscape dollars to literally wash away, you must consider proper drainage in your landscape design. A critical point to always keep in mind: the Earth is not flat, neither should be your yard. Also, Gravity works. And, Water Flows downhill. That about sums up everything you need to know. Now, making all that happen in your yard…. A touch more complicated. Take a look around to identify obvious high points and low points, note where water collects and is a problem, and visualize traffic patterns and how you will use your yard when wet. Beginning with the lowest point on your property, where all the water will eventually drain to (the outfall to daylight), work backwards with your elevations to the highest point of collection. Drain lines should have a minimum of 1/8in per foot fall (slope along the pipe, so 4ft of pipe slopes 4/8 or 1/2in, 8ft of pipe slopes 8/8 or 1in, etc). Flat surfaces (lawns, patios, steps, walkways) should have 1/4in per foot of fall (you will barely notice the slope at all, it will feel “flat” to you). Any slope over 1/2in per foot becomes noticeable. Always slope away from any structure (like your house) and toward surface drain collection points. Run underground drain lines from collection points to your daylight outfall, and enjoy your yard in the rain!
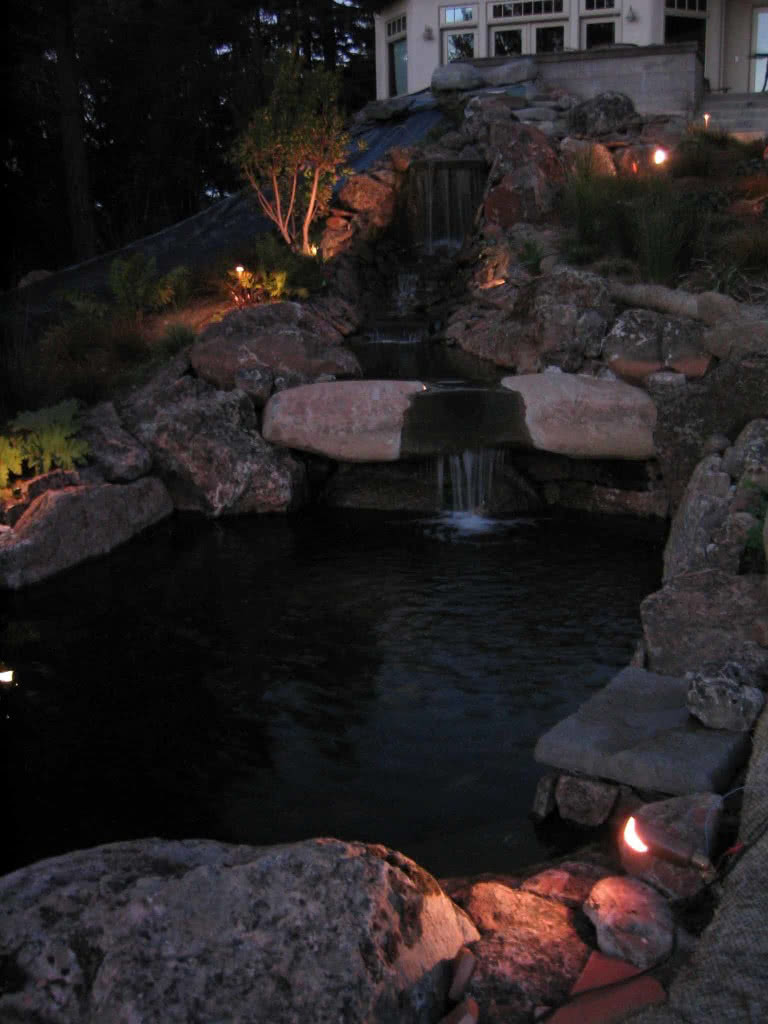
There’s nothing quite as frustrating as wandering around your yard, a family party in full swing, surrounded by thirsty guests, in the dark, searching blindly for an electrical outlet to plug the blender into. Meanwhile, your neighbor’s teenagers are bluetooth streaming their iPods louder than your battery powered 1980’s boombox throwback, completely drowning out your party-themed Beach Boys with Britney and Miley and the occasional Eminem (ask your kids who they are). Or maybe you’re the type of person who thinks personal safety while walking from the front door to your car in the early morning is important. Whatever the incentive, here’s a few tips about Landscape Electrical: you can never have too many outlets; you can have too many (and too bright) lights; xmas lights work better when plugged in; in fact, most electrical devices work better when plugged in. While planning your landscape underground (irrigation, drainage, electrical); remember that a few dollars now will more than pay for itself in the future. Once you have your site cleared, start trenching away! Add outlets everywhere, for radios, blenders, power tools, who knows what. You don’t want to drag a garden hose all over your yard to water, do you? Why drag an extension cord around either? Landscape lighting is a delicate balance of utility, functionality, and beauty. Adding lights along walkways and patios is simply a matter of safety. Placing tree lights along the outer perimeter of your yard extends your nighttime space beyond your dark house windows. I suggest you try this at home: turn the lights on inside your home and look out a dark window, all you see is your reflection! Now place a light outside in the yard (flashlight, floodlight, whatever you have handy), and notice how your interior room no longer ends at the window but seems to extend outward into the yard. Neat huh? Electricity is your friend!
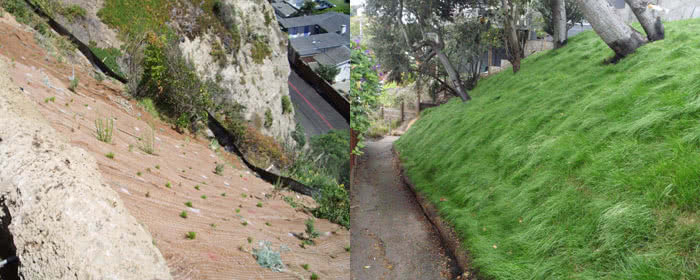
This is one field that has most certainly developed, favorably, over the past few decades. As we happen to live right along the Pacific Ocean, erosion along coastal bluffs (Big Sur in particular) is a constant force to be reckoned with. In The Good Old Days, wooden retaining walls were cutting edge. With time, we came to learn that vertical retaining walls simply capture rain that would otherwise just blow up the cliff face, thereby actually adding to the very erosion issue we were trying to solve. Oops. Hard to put a 300ft cliff in a wind tunnel, but the industry did learn from its mistakes thankfully. We now favor native plantings, such as grasses and shrubs, to bury their roots deep into the soil and stabilize the slope, while looking natural at the same time. Even this process has evolved, from hydroseeding (not all the seed actually grows, limited success), to plugs (planting small sprouts, like tree, shrub, and grass seedlings, and again, not all plugs actually grow so limited success), to the current trend of using native grass sod to completely blanket a slope with instant stabilizing grasses. This last method has proven so incredibly successful that we refuse to use any other method. The photos show Old School on the left using cocomat and plugs, and New School on the right, using native grass species in sod form. Just roll out the green carpet!
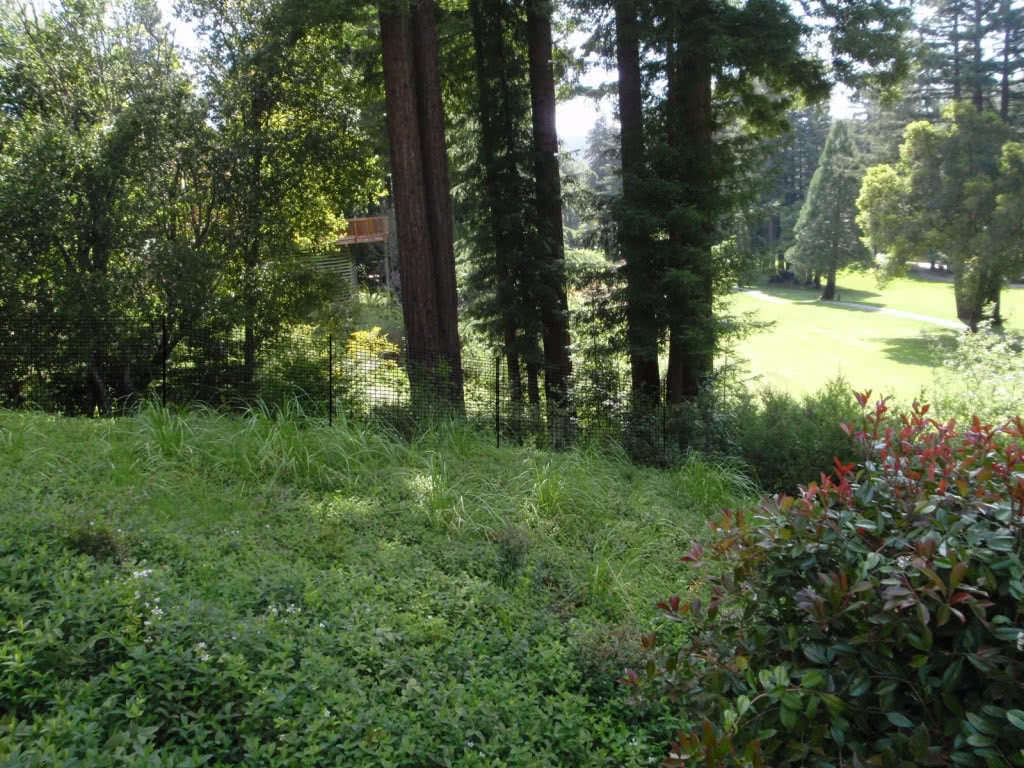
I have two Rat Terrier / Chihuahua mixed breed dogs. One is old, slow, and can barely climb onto the couch, but loves to dig. The other is young, long-legged, and can easily jump up and over 4ft with a slight running start. My girlfriend is trying to grow roses. We both love fencing! Whether you’re trying to keep your dogs safely inside your yard, keep those rose-loving deer firmly outside your yard, or keep your kids from playing in the street, fencing has both a utilitarian and visual role in the landscape. Fencing is used for privacy, for keeping things in or out, or simply to define a space. Solid privacy fences are typically 6ft in height (check your local building code for height restrictions), while barrier fencing depends on what critter needs blocking. Deer fencing is often 6ft to 8ft in height, but completely see thru, made of nylon netting. Dog fencing is often 4ft – 5ft in height, depending on the size of your dog (my Rat Terriers stay behind a 4ft fence with invisible fence radio wire on top and 30in of root barrier beneath, for both my jumper (radio collar) and my digger (root barrier)). While livestock may need extremely stout fencing, a delicate picket or lattice fence may be all that is needed to keep children from escaping into traffic. At my home, I replaced my white wooden picket fence after years of scraping and painting in favor of a white PVC picket fence, which easily cleans up once a year with my pressure washer. Spot the black nylon deer fencing in the photo.
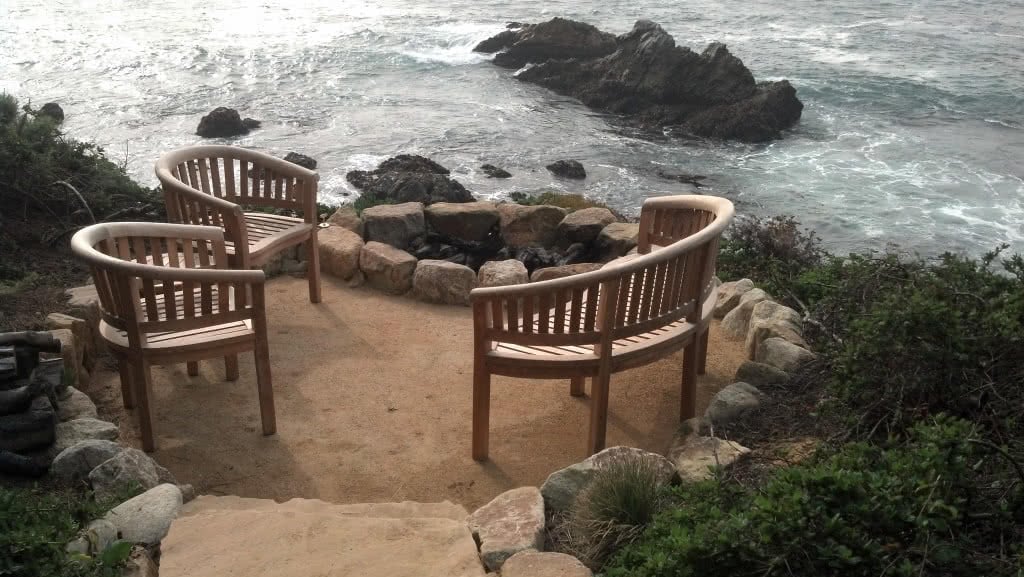
My girlfriend recently purchased new patio furniture for her back yard, and she wanted to include some form of fire pit for evening warmth and to act as a focal gathering point for guests. We looked at all the fire pits, torches, bowls, heaters, etc at our local patio furniture store, and in reviewing all the options, realized a few key points concerning landscape fire pits. First, when considering a fire pit, determine its use. Do you want to keep warm? Keep the flame low to the ground, otherwise all your heat simply escapes over your head. Do you want to cook? Marshmallows can get messy, so a fancy polished copper fire bowl is probably not a kid friendly choice. Do you want a small ornamental flame? Consider a propane powered, self-contained fire pit that can be placed on a table. Do you want to melt the paint off your neighbor’s car? Build a masonry firepit, line it with firebrick, install a stone seat cap, and hook the oversized burner unit and ceramic log kit up to your home’s gas supply (natural gas or propane, either one burns great). If you’re 15ft from the ocean, 30ft up a slight cliff, the bigger the flame, the better for both warmth and signaling passing freighters on their way up the coast to San Francisco.
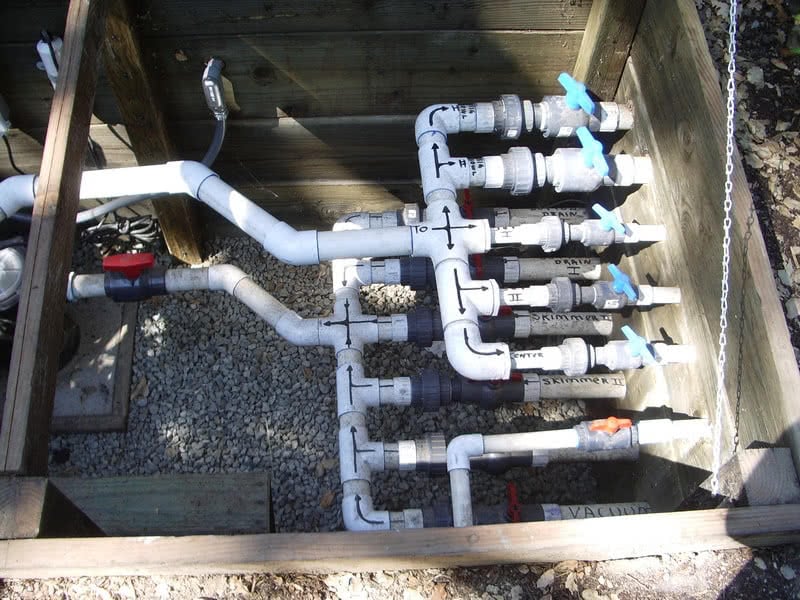
Everyone loves water. The sound of running water (unless you are having failed plumbing nightmares) is soothing, relaxing, and can mask other annoying noises such as your spouse, your kids, your boss, traffic in your neighborhood, or just your neighbors, period. Fountains may provide fresh water to all sorts of critters such as butterflies, birds, cats, bats, rats, raccoons, bear, mountain lions, flesh-eating piranha, oh…sorry…I mean kittens and puppies. The simplest form of fountain is the long-standing bird bath, with or without a small electric pump, available at any local hardware or home improvement center. Flush the water clean once or twice a month with a garden hose and enjoy the wildlife. Next comes the more elaborate built-in fountain, usually constructed of masonry with a waterproof holding pond and some form of centralized spouting feature. I suppose the Bellagio in Las Vegas still counts as a fountain, but I have yet to build one quite that elaborate in any local yard. Most landscape fountains serve as centerpieces to an entry driveway, courtyard, inner patio, or backyard play area. Our local building codes limit the depth of a fountain to less than 18in, before it qualifies as a swimming pool or spa and thus subject to more strict safety codes (fencing being primary). Make sure your fountain has adequate circulation and filtration and is easy to maintain, otherwise your love of water may evolve into a hatred of slime and algae, and label your pipes!
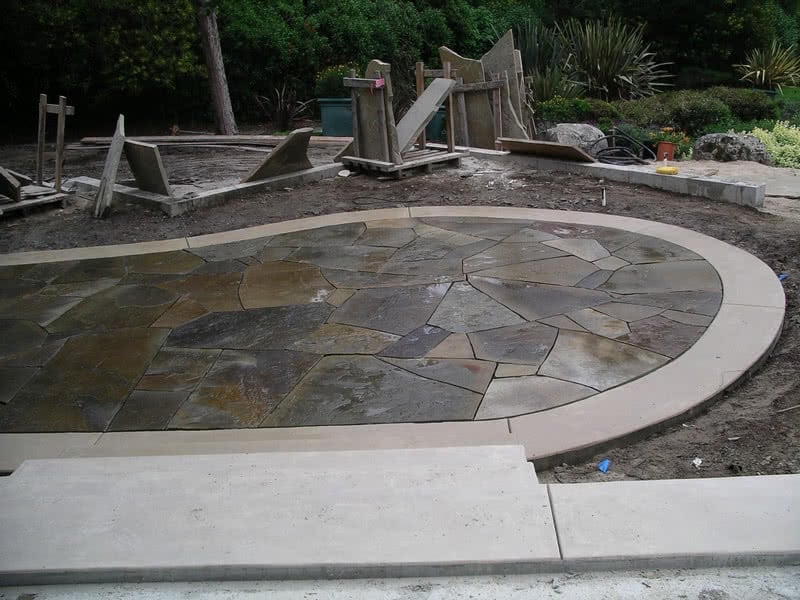
Not just for Fred & Wilma Flinstone anymore, flagstone has found its way from cave entrance to entry porches to entire driveways. The term flagstone generally refers to a type of sedimentary stone, easily quarried in thin layers averaging 2ft x 3ft by 2in thick in size. Depending on where the flagstone comes from, it can range from sandy flagstone found in the Western States, to a more dense, finer silted slate found back East. Colors range from uniform reds, yellows, chocolates, blues, grays, and buff, to more splotchy varieties in the same colors, to the more multi-colored slate varieties with a new color every inch or so, to surface flagstone adorned with living lichens and moss. In any color you choose, the workability of the flagstone will greatly affect its ease of installation and suitability of purpose. Think of laying flagstone as an adult jigsaw puzzle. Try to avoid the smaller, dinner-plate sized pieces of flagstone commonly found at home improvement centers: while it may be easier to lift and carry smaller pieces, the labor to properly set each piece easily triples. Stand-up Select refers to larger flagstone pieces, 2ft x 3ft or larger, stacked vertically (standing up) on a pallet or in a crate. Do you want a jigsaw puzzle with three pieces and a cold beverage waiting, or 300 pieces and the chiropractor waiting? Also, thickness matters. When setting flagstone on sand, 2in thick is the absolute minimum, otherwise, each piece will snap when stepped on. When setting flagstone on a concrete base with grout joints in between, 1in may be acceptable. Remember to keep your gout joints tight and even, the mark of a professional installation.
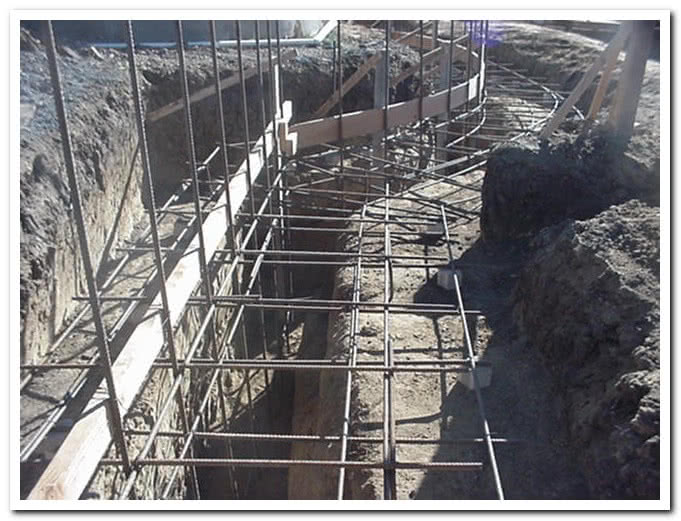
Referencing the section on CMU Walls, a footing is the below grade portion of a structure that anchors the lateral forces and disperses the vertical forces. In other words, it’s a really big heavy hunk of concrete buried in the ground with a ton of reinforcing rebar in it. A concrete footing serves as the foundation for, well, the entire foundation of a house, a CMU landscape wall, a weight bearing deck post, or in extreme cases, the Hoover Dam or the Golden Gate Bridge (different terminology in those cases, but similar in concept). A less extreme but very common landscape footing would also include the layer of compacted drain rock and base rock found beneath dry-stacked Allen block and natural rock boulder walls. Typically a Soils Engineer is involved in testing, designing, and specifying the type and size of footing required for any given project. The photo shows a concrete footing, 4ft x 1ft with a 1ft x 3ft key, dual horizontal rebar layers, with #6 grade 60 verticals 16in O.C., uphill side on the left of the photo. In other words, a really big hunk of concrete, but it was designed to hold up an entire swimming pool, so…. For those DIY types, when making an offset footing, remember the corner of the L goes on the uphill side, so for the letter “L”, uphill would be on the left, just like in the photo. That way your wall has to lift the entire weight of the footing in order to fail, rather than just rotating on the corner and tipping over if the L orientation was reversed. Good to know, huh?
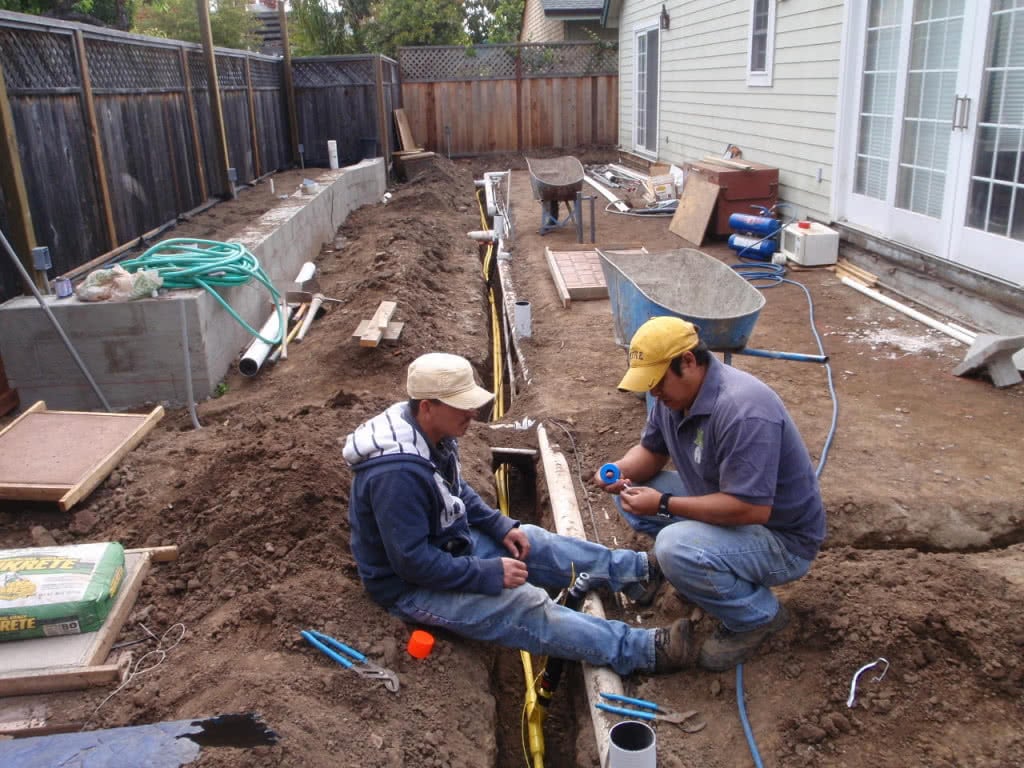
There are few things in a landscape more rewarding than the peace of mind found in an endless supply of gas to a fire pit, patio heater, BBQ, or outdoor kitchen. Everyone who uses the ubiquitous 5gal propane cylinder to cook on has at one time or another experienced the dread of running out of gas with a grill full of raw chicken and a house full of hungry expectant family and guests: host fail at its worst. Starting a wood fire is so much easier when using gas instead of kindling or lighter fluid. Heating is so much easier when using products that produce heat (gas) rather than products that retain heat (thin cold blankets). Cooking is so much easier when you’re cooking with, well, you get the idea. For landscape projects, yellow poly SDR-11 gas pipe with a yellow 14AWG tracer wire in a 24in deep, sanded, taped trench is preferred, both for cost, longevity, and safety. Gas line sizing is also very important, as some appliances either won’t work or may burn (literally, as in melt) if fed with an undersized gas pipe. Determine the BTU requirements of whatever appliances (BBQ, fire pit, heater) you’re installing, the total distance from source to appliance, then reference the manufactures sizing charts to determine your proper gas line pipe size. For example, a natural gas fire pit at 115,000BTU and a patio heater at 60,000BTU (175,000BTU total), over a distance from gas meter to farthest point of 120ft, requires an IPS 1in poly gas pipe, with a maximum rating of 185,000BTU at 125ft maximum (we’re 175,000BTU at 120ft, close to the limit). Confusing? Good. Hire a landscape professional, maybe even us!

In a word: you need it. Now don’t get me wrong, I love cute furry little creatures as much as the next person, but in a landscape setting, gophers and moles are just like weeds: the fewer, the better. I have a moral objection to really killing much of anything. I rescue insects drowning in mud puddles. I carefully step over crawly things on the ground rather than squishing them. I trap spiders and put them outside the house to live out their days. I feel bad when my cats bring me a bird or rodent that is too far injured to nurse back to health. But when a momma raccoon viscously attacked my dog year after year inside my home (she would come in through the dog door to get to the cat food), well, she finally had to go. And when I spent $4,500 to plant a native Arbutus marina tree in my front entry for the hummingbirds to feed on, only to have its roots eaten and the tree killed by gophers, well, even I have my moral limits. With so many pets of my own in the yard, and not liking the potential suffering that poisons can cause the target species, I chose a gopher control service that sets pet and child safe traps. They come, set traps, collect gophers, and I happily write a check. I did leave one area outside my fence line where the gophers are free to roam, which makes my cats happy as it turns out, but elsewhere in my yard, not a dead plant in site. As a company, we also support the Hungry Owl Project for larger properties.
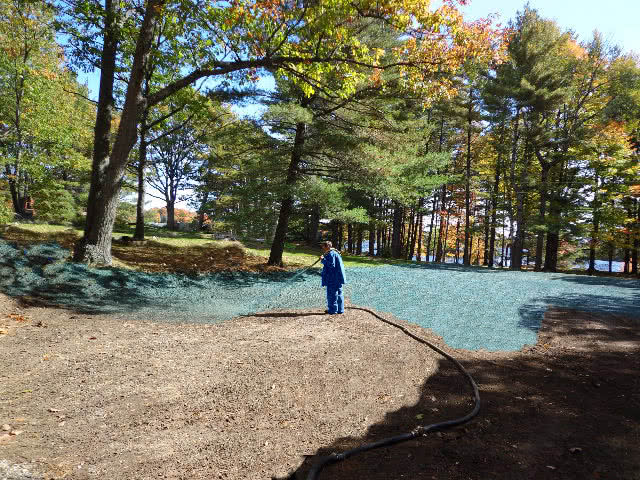
Typically used to mitigate areas disturbed during construction, hydroseeding covers lots of ground, fast, with grass seed or other relatively fast growing plants. Spraying a paper mache-like material mixed with seeds, fertilizer, and tackifiers (makes the stuff stick), a hydroseeder may cover thousands of square feet an hour with ready-to-grow seed mixes, PROVIDED the area has been prepared first! Seeds won’t grow without: good soil; lack of weed competition; sunlight; and at least a temporary water supply to get the new plant mix through it’s first dry season. Often seen as the cheap alternative to cover lots of ground and satisfy building requirements, people often (like, well, always) overlook the cost of adequately preparing the area to be seeded. Removing weeds, fertilizing the soil, installing temporary irrigation (usually above ground spray systems), all add to the cost of a hydroseed application. We like to back drag the area with our tractor to scarify the soil and remove weeds, spread a thin layer (1″-2″) of good topsoil, hydroseed, then finally spread a few inches of seed -free straw over the entire area to help retain moisture and discourage wildlife from helping itself to a free seed meal. We commonly use a mix of native grass seed, native shrub seed, and native wildflower seed, to give the area a deep rooting mixed vegetation look that’s great for drought resistance and erosion control.
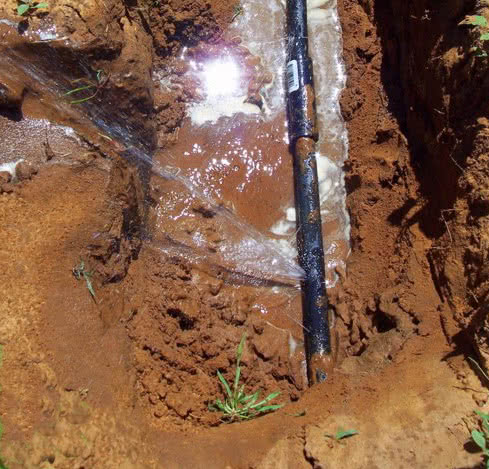
I refer to irrigation as irritation. As a home owner, it seems I’m constantly fighting against our local water district over water consumption for landscape purposes. With water supplies so low in California, drip irrigation has become the norm in most landscapes. While being very efficient in providing water directly to those plants you intend to water (and not to all your surrounding weeds), drip irrigation does have its, well, irritation aspects associated with its use. In my yard, my two small dogs continually either dig up drip irrigation lines, or, while running around chasing my cats, pull off my drip emitters at each plant. Either way, the results are small geysers of water making a weak impression of the Bellagio Fountain in Las Vegas every time I water. We have taken to installing underground drip systems, with in-line emitters, that both provide point-source watering and are more dog and people resistant. Now if we could only prevent those darn gophers from biting thru the tubing in search of drinking water……
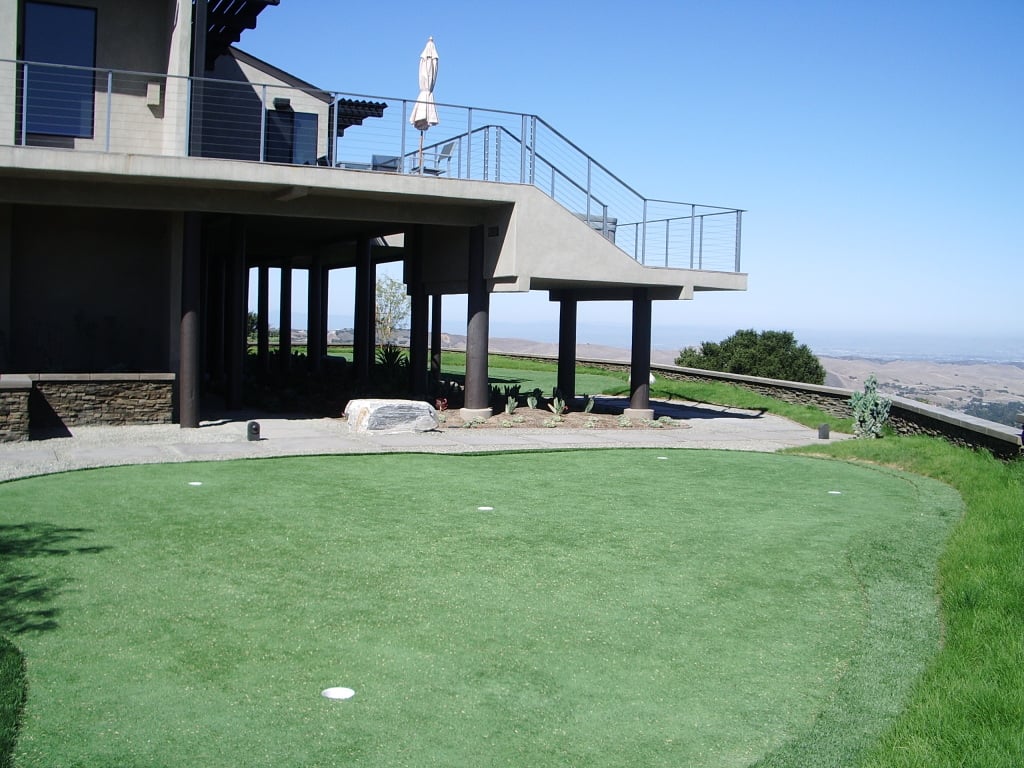
Real grass lawns have become the most wanted poster children of the California drought. Seen as public water supply enemy number one, many water districts offer cash incentives to tear out perfectly good existing lawns in favor of more drought tolerant and water friendly landscapes. Planting and maintaining a new 100% Kentucky Bluegrass lawn may indeed be a bad idea, both for your landscape budget and your monthly maintenance and water bills, but many water conscious and responsible options still exist if nothing but green real grass will work for you. Several turf companies in the Central Valley of California grow and ship some excellent dwarf fescue grass blends, a slow growing (don’t mow as often), drought resistant (uses less water than other grass blends), kid friendly (soft fine blades) type of sod lawn. Taking the fescue line to the extreme are the “no mow” or “mow free’ blends, a type of grass that grows to perhaps 8 inches maximum and needs water only a few times a year (yes, a few times a year, not a few times a week). We have installed fescue sod lawns over sand catchment systems with underground water storage cisterns in order to recycle the same irrigation water over and over. We’ve installed fescue with underground water sensors that electronically monitor soil moisture content and irrigate the minimum amount only when needed. And yes, we have torn out perfectly good real grass lawns and installed synthetic turf, but that’s info for another section. Just remember, when only real grass will do, go dwarf fescue.
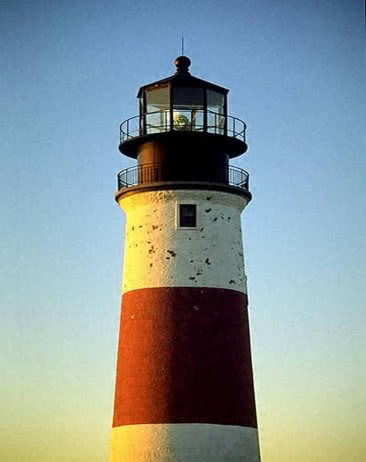
Back in the day (all the way back in the early 1990’s…..), lighting an outdoor space with the miracle of this newfangled electric power stuff was considered mysterious and dangerous. I encountered a County building inspector who simply did not understand the physical flow of electrons and would not allow a particular landscape lighting project of mine to pass inspection. Baffled, I contacted the National Fire Protection Agency in Florida, who writes and publishes the National Electrical Code my inspector was triumphantly waving in front of my face. The NFPA politely informed me that if I didn’t like the law they way they had written, I was welcome to try and write my own. Always up for a challenge, I promptly shot back key elements of what a few months later was published nationwide as Article 411 of the National Electrical Code, the first section to directly address low voltage landscape lighting. And yes, I got my project passed through the County. If you don’t like the law, write your own! Today, a few decades later, landscape lighting has become as common as landscape planting or landscape irrigation. Just as you wouldn’t consider building a house without lights, you definitely should leave room for landscape lighting in your budget. Lighting pathways and driveways obviously adds safety and security to your home at night. Uplighting accent trees, shrubs, walls, or fountains extends your interior living space beyond the confines of your home’s dark glass windows. Downlighting patios from high up in a tree creates a natural moonlight effect. And don’t forget to add underwater lights to any pond, pool, or other body of water for that wonderful ripple effect.
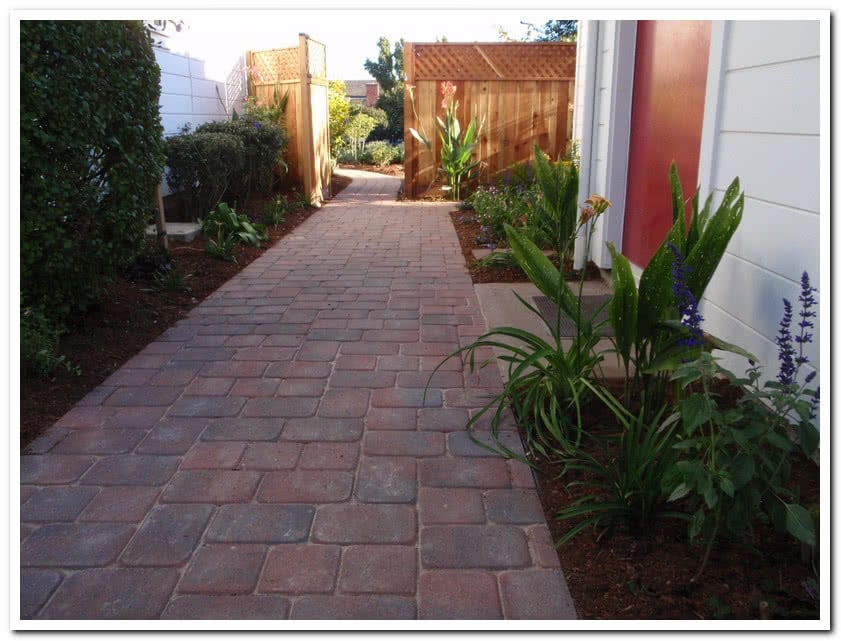
Interlocking pavers are a fantastic way to cover large areas of hardscaping, while still maintaining water permeability. Many building regulations limit the amount of hard surfacing (concrete, asphalt, etc) allowed on a residential parcel, yet homeowners still need a place to park their cars, walk to their front doors, and set up patio furniture out of the mud. Concrete pavers come in so many colors, shapes, sizes, and patterns that finding an option that suits your tastes and budget becomes incredibly easy. We have installed Old World cobbles that resemble Roman roads from centuries past, charcoal red pavers the blend perfectly with existing brick patios, and countless miles of herringbone pattern paver driveways that lend a touch of class to what otherwise would be a long boring ribbon of asphalt leading up to your estate. Pavers need several inches of good, clean, compacted baserock beneath them to support the weight of vehicles or large crowds of party guests, up to a foot thick for heavy traffic areas. A thin layer of sand follows, then the top layer of pavers which lock together tightly. Once installed, sweep a layer of coarse sand into the cracks between your pavers to further lock them in place. More recently, every paver project we have installed was over a base of special permeable stone and gravel layers a few feet thick, which not only supports the weight of daily traffic but provides a convenient catchment basin for rainwater to be used in landscape irrigation. This permeable installation helps greatly with maintaining lot hardscape coverage limitations, especially when considering how many square feet a driveway can consume of your allowed hardscape building code budget. You may also wish to consider sealing your pavers with a waterproofing or stain proofing treatment, as concrete pavers tend to absorb spilled stains (car oil, red wine) easily. You can also add compounds to your final locking layer of coarse sand that fill the paver joints with a rubber like sanded consistency for the ultimate in sweep-ability and maintenance.
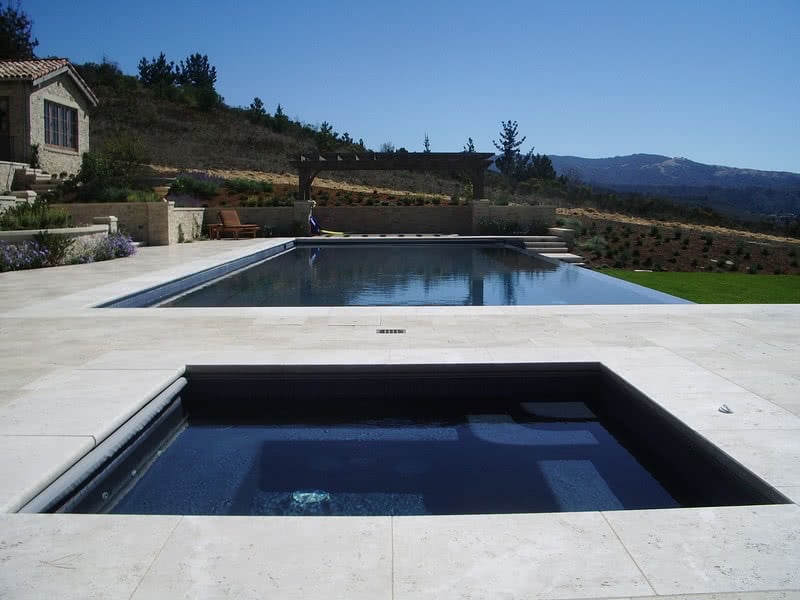
Jerry Allison has worked in the pool industry since 1984, when he first built the Koi Pond and Waterfall at Severino’s Restaurant in Aptos, Ca. Since that time he has collaborated with Jack Anderson, the former owner of Precision Pools, to incorporate many different types of swimming pools, spas, and water features into the yards and lifestyles of their mutual clients. When Jack retired, Jerry took over the helm of Precision Pools Inc, and now combines technical aspects of pool construction with broad aesthetic and design talents acquired over 40 years in the landscape industry. This blend of engineering technicality and wild design flair has produced some rather remarkable swimming and water recreation opportunities. We’ve built natural back yard swimming holes with slippery water slides, wild rope swings, and rocky jumping points. More formal settings required long recreational lap swimming lanes that double as elegant reflecting channels for lit water fountains at night. Another pool served as the kids’ skate park, with smooth transitions, excellent vert, and grinding sections, before finally being filled with water for the parents to take their turn relaxing after a long day at work. Shallow beach entries to lounge in, swim up adult beverage bars, underwater seating and tables, umbrella insertion brackets, tile turtles, sharks, dolphins, and schools of tropical fish, underwater music, fiber optic lighting, waterproof televisions, you name it, we’ve probably messed with it at one point or another. From a private backyard oasis to a military base water park to a golf resort pool and spa to underground rainwater storage cisterns that no one will ever see, we have the experience and imagination to make it happen. If you are considering a pool or spa for your landscape, ask about chlorine-free water, pool fencing options, automatic safety covers, solar heating, pebble and plaster finishes, and variable speed pumps to make your water time safe, enjoyable, and worry free.
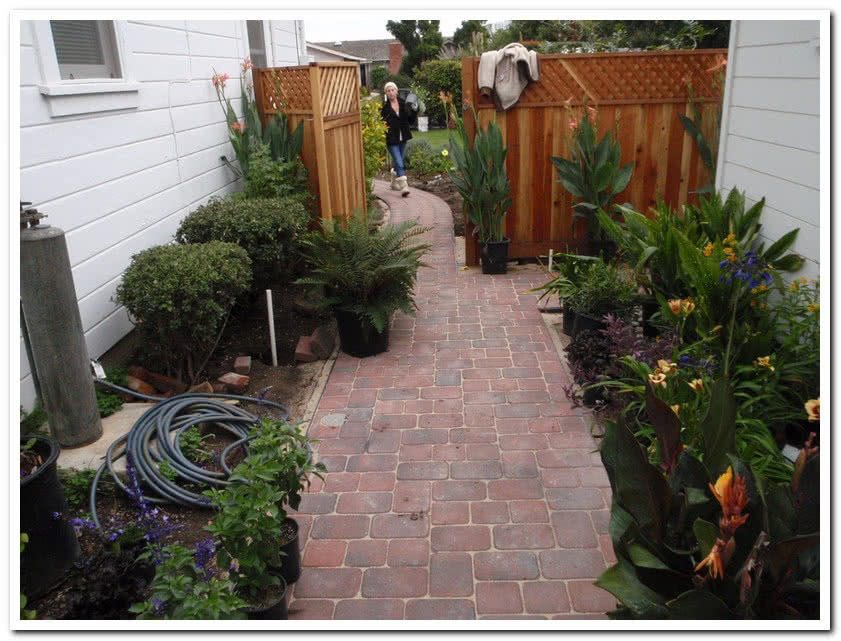
Yes, even though we are mostly a construction company, we do indeed install plants on occasion! Notice I said “install” plants, rather than just “plant plants.” Anyone can dig a hole and stick the green part up, the brown part down, and throw some dirt at it. Choosing the right plant for the right location, taking into account soil condition, micro and macro climates, water availability, sunlight factors, prevailing wind directions, root depth, drought and disease resistance, maintenance needs, growth rates, etc etc etc, all while making sure it looks good to the homeowner, well, that takes special contractor installation skills. Especially when we guarantee your plantings for one year from date of installation, in writing, we have to make sure we get it right the first time around. For your part, make sure you express your color preferences, height requirements, any allergies you or your guests may have, maintenance commitment you’re willing to (or not willing to) make, and any other aesthetic desires you may have. For our part, we will design different planting options for your approval and installation. Generally speaking, softscape plantings serve to soften the harsh edges of hardscaping such as walls, fences, concrete, and the like. While hardscaping may serve as the main infrastructure of a yard with paths, patios, and pools, softscape plantings are what most people focus their attention on. Plantings are the colorful, interesting, fragrant portions of an outdoor space, and yes, weeds draw your attention just as much as perfect landscaping does, or more so if you’re as OCD as I am. Always take into account how you wish your yard to look in a few months, or a few years, and who is going to maintain your yard weed free, well watered, and nicely manicured. Or, just call a landscape maintenance company, sit back, and enjoy the envy of your neighbors in your perfectly planted landscape.
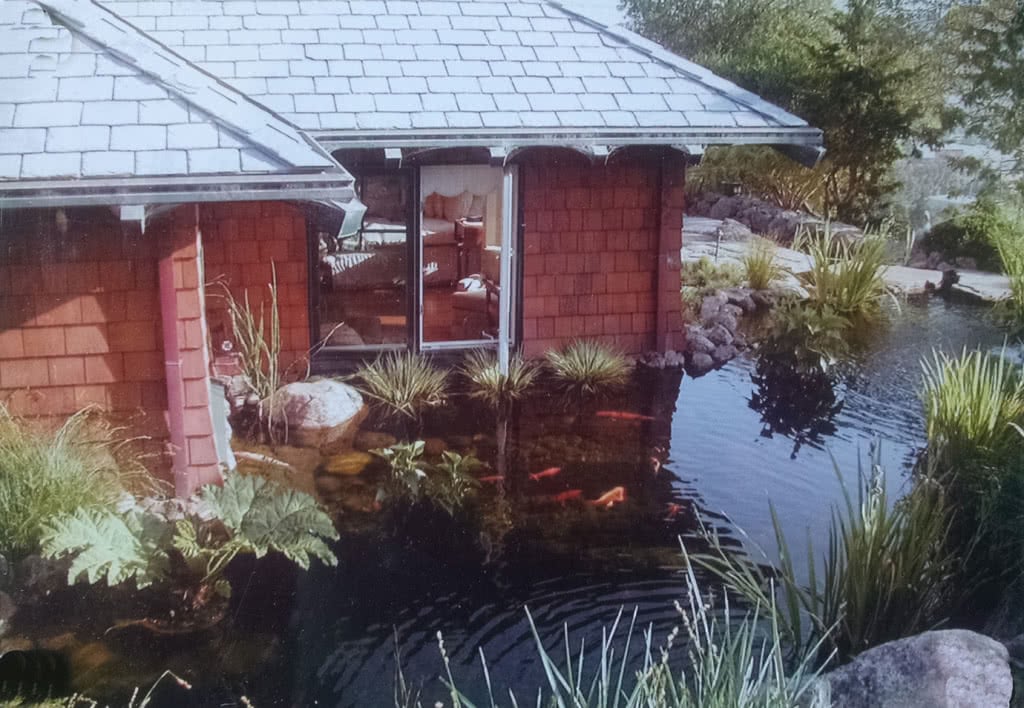
We like fish! While not every pond will feature thousands of dollars of prized koi swimming in immaculately maintained crystal clear water, most ponds have at least a handful of goldfish swimming around to entertain and mesmerize. One common question we get asked is the difference between a pool, a pond, and a water feature. Typically, a pool is devoid of life in the water, using chemical treatments to kill all little nasties that swim, squirm, or otherwise mess with human health. A pond, conversely, is full of life, using biological processes to maintain clean, healthy water while still allowing fish, frogs, dogs, and kids to spash and frolic on warm summer days. A water feature, while technically still being as large as a Las Vegas style Bellagio fountain, tends in a residential landscaping to be a small, purpose built water movement area such as a bird bath, small fountain, pondless waterfall, reflecting pool, a ceramic pot with a few lucky bamboo and a single goldfish, and the like. More often than not, homeowners want certain aspects of all three water types, desiring the ease of maintenance and cleanliness of a pool, the softness of fish and flowers, and some interest such as a waterfall or creek.
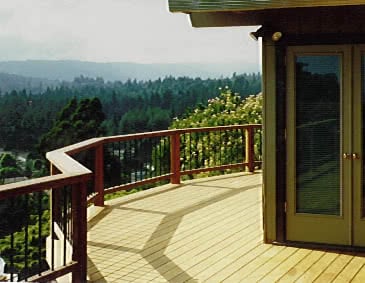
Not too exciting…. Until you need one! Railings primarily prevent you from enjoying too many of your favorite beverages and falling off your deck to your doom below. They are generally required any time the drop is over 30″ from deck to ground, which, trust me, is enough to hurt. I personally built one railing for a redwood deck in Los Altos. The homeowner complained that the railing “felt flimsy and I don’t trust it”, expressing his concern over his family’s 1) average body weight, and 2) ability to imbibe alcohol. He asked me to remove the railing and rebuild it, at a cost of several thousand dollars to our company. Honoring our client’s wishes, we rebuilt the railing at our cost, but not after I tried to destroy it by getting every person on our crew to run and jump against it in an attempt to make it fail. We couldn’t break it, but it did indeed flex. Looking further, I discovered that a 6×12 beam that the railing was attached to underneath the deck was actually flexing and twisting, just as a redwood tree sways in a strong wind. I tried to explain to the homeowner that while the railing may indeed “flex” it will certainly not break or fail. We ended up adding a steel plate beneath the deck to remove the “flex”, but it was certainly overkill. By the way, the amount of “flex” felt was about 1/2 inch of deflection at the top of the railing, not enough to be a safety issue, but, enough to reduce the homeowner’s confidence in our product. This project was over 30 years ago, and ever since, we always inform our clients that anything constructed of wood, including railings, may flex just like a tree in the wind but will not fail under even excessive body weight. Safety first, when it comes to railings.
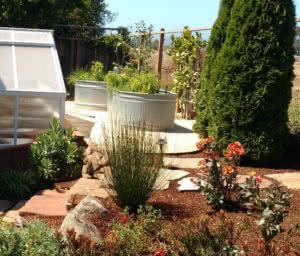
A great solution to back-breaking gardening! Let’s face it, kids are closer to the ground than most adults, so I feel they should be the ones bending down to pull weeds and plant vegetables, not me (I happen to be over 6ft tall, just sayin’). Yet when kids aren’t around, a raised vegetable planter works great! Whether made of redwood, cedar, or the latest craze, galvanized troughs, raising your planters just a few feet up from the ground makes a world of difference in plant ergonomics. Think of a raised planter as a kitchen sink: sure, you could wash pots and pans with a bucket on the floor, but having a wash basin at kitchen counter height just makes doing the dishes more enjoyable, if that’s even a thing. Also, planting your tasty vegetables above ground helps deter rodents, wascally wabbits, and other unwanted critters from chewing on your crop before you do. If you choose wood, avoid Pressure Treated lumber due to exposure to chemicals you do not want to ingest. Add gopher wire under wooden raised planters, and drill drain holes in the bottom of galvanized trough planters. Your back and your vegetables both will thank you!
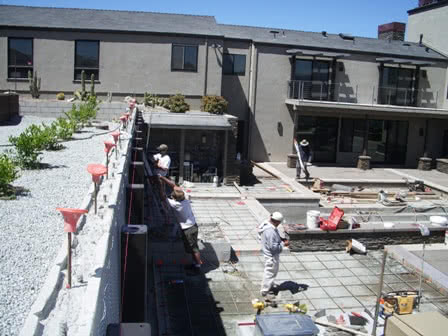
While not all retaining walls may be as grand as The Great Wall of China, sometimes they can feel as massive when the wall you’ve built has to retain 14ft of parking lot from collapsing into your new swimming pool. For the typical landscape, a wooden retaining wall suffices for heights under 3ft, and functions by using friction against the buried posts (same height down as up) to keep the upper wall from tilting over. Anything over 3ft, or with a serious mountain slope behind it, CMU block and concrete become the materials of choice, using a substantial concrete footing as counterbalance against the force of the earth trying to tip the wall over (think really big clown feet). In either case, retaining walls are great for leveling sloped yards (making terraces), defining walkways, making raised planters, or holding back soil in general. Not limited to wood or concrete, walls may also be made of stacked rocks and boulders, premade interlocking blocks, even used railroad ties are an option. Please note: do NOT skimp on the retaining wall budget, you only have one chance to do it right.
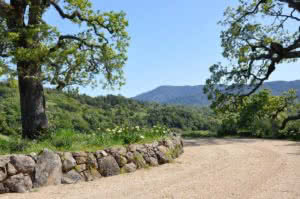
I feel rock walls are certainly the most aesthetically pleasing type of retaining wall. We prefer the drystack fieldstone look, with natural lichens and moss that help blend harsh vertical lines into natural, subtle changes in grade that your eye accepts as just part of the landscape. If you examine the photo, you’ll notice one very important distinction with our version of rock wall: the use of large boulders, up to the height of the wall itself. So often we sadly see tall drystack walls made of nothing but head sized stones. Not only are these walls, in our opinion, ugly, but they are inherently unstable as well and prone to failure. My neighbor built his own rock wall, using only smaller head-sized stones, three times (as in, it failed twice, and I’m just waiting for it to fail again next winter). We use a mix of large and small boulders, with success, to build rock retaining walls 10ft and taller, with a more natural look, using individual boulders as large as 20+ tons. While your project may not need something as massive as a single rock 4x heavier than your SUV, we encourage you to consider drystack fieldstone rock walls.
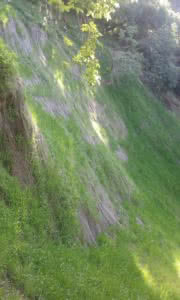
Here we are making the distinction between grass seed, and grass sod. Seed comes in, well, dry bags of seed, and must be planted and watered for weeks, whereas sod is grass that has already been germinated and rolls out like an instant green carpet, ready to mow in a week or so. Where this difference becomes critical is in the use of erosion control on failed hillsides. Caltrans will often scour a landslide area, lay down tan cocomat fabric to catch wayward rocks and dirt before car windshields get damaged, then use a hydroseed service to spray grass seed and a tacifier (tacky glue) onto the hillside. With almost daily watering and a lot of luck, you’ll get about 30% of the seed to germinate and grow, mostly in less steep, shaded areas, with the more exposed areas almost completely lacking growth (see photo). Another example compares trying to grow a front lawn from seed in a few weeks (read: expensive bird food) versus rolling out instant sod in a few hours. As perhaps you can tell from my bias, we don’t do a lot of seeding.
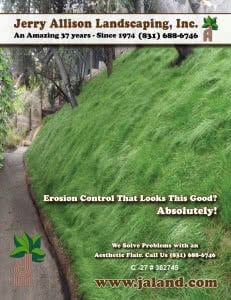 Sod in this context refers to grass seed that has been grown and harvested in a carpet-like roll, ready to lay out for that instant green lawn look. We almost exclusively use sod when installing recreational lawns for your mowing pleasure. Dwarf fescue blends are the preference for residential lawns in drought conscious California, a mix of coarser fescues and finer bluegrass. We also have access to a type of sod called Mow-Free, a special grass blend that only gets 4-8 inches tall on average, and as the name implies, essentially requires little to no mowing, ever. This Mow-Free blend is fantastic for erosion control as the roots are very deep, require little to no watering, and is available in sod form ready to roll out for instant hillside stabilization. As perhaps you can tell from my bias, we do a lot of sod.

“How can you plant any plants if you don’t prep your soil?” (No? Anyone remember Pink Floyd? Anyone?) Proper soil preparation really does make a difference in the success of any green gardener’s campaign to turn bare dirt into fertile happy growing grounds. Where we may see a barren dirt field, a farmer sees the results of endless hours of tilling, fertilization, pest and weed control, and precision grading in order to prepare for this year’s bumper crop. When landscaping a residence, we usually bring in new plants that are not normally found on our properties (if we wanted the weeds that were there, we could have saved ourselves tons of money). These new plants need a little love to establish themselves in their new environment. At a minimum, a large planting pit with nutrient rich topsoil backfill will provide a vitamin kickstart to new plantings, whereas a new sod lawn really needs truckloads of mulch rototilled deep into the soil. And don’t overlook the benefits of proper grading! Our soil prep process included weeding, clearing, amending, tilling, and grading, all before the first plant goes in the ground.
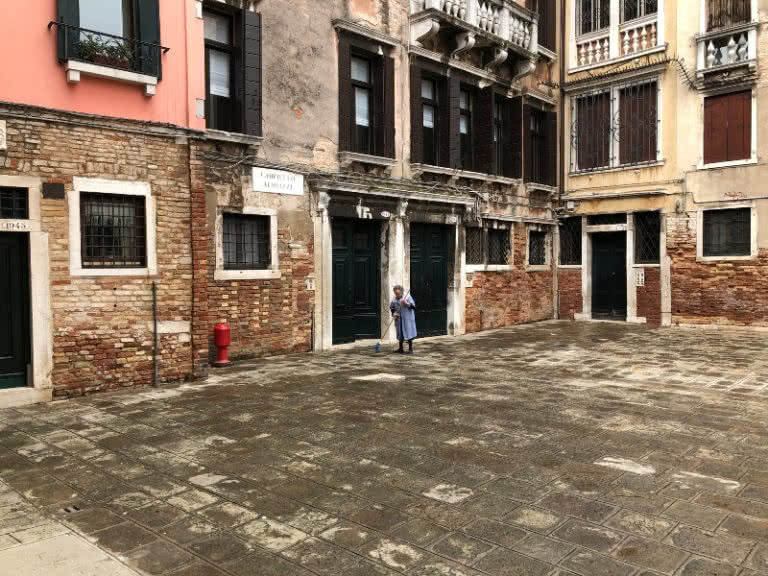
A mixture of sand, cement, and color, we use stucco (some call it plaster) over vertical surfaces such as walls to cover the underlying structural brick / block / wire. Our photo shows buildings with exposed brick (bottom story) covered over with stucco on the upper stories. Having integral color, stucco is durable (hard as cement), inexpensive, and retains its coloration for decades. We apply stucco in at least two layers, and often three. The first few layers are called Scratch and Brown coats, and are allowed to harden and crack before the next layer is applied. The final layer is a Top coat, and may be applied in any number of colors and finishes. For landscape walls, we typically apply a Scratch Brown Finish combination over both cmu block and wood / wire walls, for longevity.
